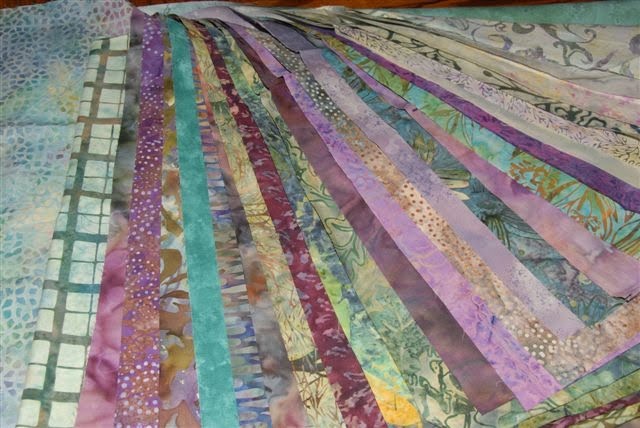
I've learned a lot in my two beginning quilting classes. For instance, here's some quilting terminology. There's
piecing, which is the sewing together of all the various little pieces that make up your
quilt top. Then there's the
batting, the fluffy stuff in between your top and your
backing. Putting all these three layers together and safety pinning them together is called
layering. This is preliminary to the actual
quilting, which is the sewing of all three together in any one of about a million different patterns. Quilting is what gives your quilt it's puffy dimension.
In the process of making my first little quilt project I also learned that...I'm a lazy and sloppy
piecer. Better add impatient in there, too. Having a particularly weak solar system right now, I tried to get away with piecing my first quilt with only "finger pressing" after each fabric addition. I think I mentioned in another post that we're pretty cautious and conservative with our power. Especially since we're down to only six batteries. (We're going to replace them all with 12 new batteries in the fall! Can't wait!) So, I didn't want to use my iron. In fact, I have no idea where my iron is. I know I've used it in the last 12 years since we moved up here. So, about the finger pressing:
niave and arrogant, I thought, "oh, this will work".
Well, it caused all kinds of problems. Because my presses weren't precise, my edges weren't precise. Without precise edges, the next piece I added wasn't sewn on precisely. Each piece attaches to the last one, and for this Log Cabin pattern, you keep adding bars around the square. If your seams aren't perfectly pressed along the way, the problem just compounds with every bar you add.
Not to mention the fact that I started on a machine at the quilt shop and then continued on my machine at home. I guess you're not supposed to do that. Start and finish with the same machine is what they say. Once home I mistakenly sewed my seams too wide because the little piece of tape marking the seam width on my machine was NOT at 1/4" but more like 3/8". (Enter 'lazy' and 'impatient' into the scenario. Guess who didn't bother to measure it to make sure before she started sewing. *sigh*) My squares were too small because my seams were too big. So.... nearly finished with all my blocks, I started completely over. Cut all the fabric over and sewed the Log Cabin blocks all over again.
And still they were off measurement - because of the finger pressing, my laziness-sloppiness-impatience. At class last week I was all set to sew my blocks together and hopefully add my border fabric. But my squares were so inconsistent I had to cut them down to the largest
measurment of perfect square-
ness. Which made my outer bars much thinner than the inner bars. Oh well. Live and learn. My teacher was right in that once I sewed them all together it's not immediately noticeable. At a glance, it looks fine. But if you look closely you can see that it's actually horrible!
Tonight I sewed the border on and....................
TaDaaaa!
Go ahead, enlarge the photos and see how skinny some strips are and how fat some others are! Again, oh well.
I'm all set to "layer" it now, making a sandwich out of the backing, batting, and (horrible but not immediately noticeable) top.
Here's my layered quilt all ready to be safety pinned together. ( I knew I forgot something while in town today at the 4th of July Arts Fair! Note to self: G
et large safety pins after church tomorrow.)
Here's a better picture of the backing fabric.
And a closeup.
This backing fabric will also be my
binding which is a 1/2" of fabric sandwiching and finishing off the edges.
You may have noticed my sewing machine in the first photo. It's an old antique Singer.
It's the machine I learned on in Mrs.
Saylor's sewing class in her home back when I was in grade school. It's all I've ever really sewn on, except for the occasional borrowed machine amounting to about 3 hours of sewing in the last 35 years. It was my mom's. It was the sewing machine of our household. I don't know when she got it and have no idea how old it is. I would love to know, though. I don't know if it was my Nana's before Mom. Since Mom didn't sew except for mending, I'm thinking it might have been Nana's first. I'll have to get online and do some research about when this style was made.
The sewing machine service man at the quilt shop came up to me in class with a grin on his face wanting to look more closely at it. Fellow classmates looked at it and said, "Are you making your quilt on that??" They all have "new" machines, of course. Sewing machines nowadays are incredible! They have computers in them, for cryin' out loud! I went to a "beginning machine quilting" week before last.
Machine quilting is where you sew your quilting pattern on your 'sandwich' with a machine as opposed to by hand. When I went to this class, I brought my machine but ended up using one of the shop's machines. It was the
Bernina Quilter's Edition. Price? Three THOUSAND dollars! This thing did everything! It had about 50 embroidery stitches and who knows what all else. If I were to spring for a new machine, I have my eye on the $156 model in the shop! Even that I can't justify because, hey, without easy ironing I may not be able to make quilting a real hobby! I think all machines have computers in them now, even the cheap ones. If so, then I'm sure my old Singer uses much less power anyway.
I'll try to post more progress reports as I work to finish my quilt.